Pages

Tuesday, December 24, 2013

A CHRISTMAS CARD

This Christmas Card was made for Altered Pages, using the Christmas Emporium Collection from Graphic 45.  I got the paper, diecuts and chipboard from the store, but the paper is sold out :(
I re-purposed the gold background from a set of paintbrushes I got. You can see that I used the G45 products to make the whole card.  Except for the seambinding.

Be sure to check out the store by clicking the above link!  GREAT sales are going on right now!! 

Monday, December 23, 2013

CHRISTMAS ORNAMENT

Today I am sharing an ornament I made using the Clockworks Inspired By Terri Sproul plate from SinCity Stamps.

Isn't this so cute!!  Super easy to make too!

Gather your supplies:


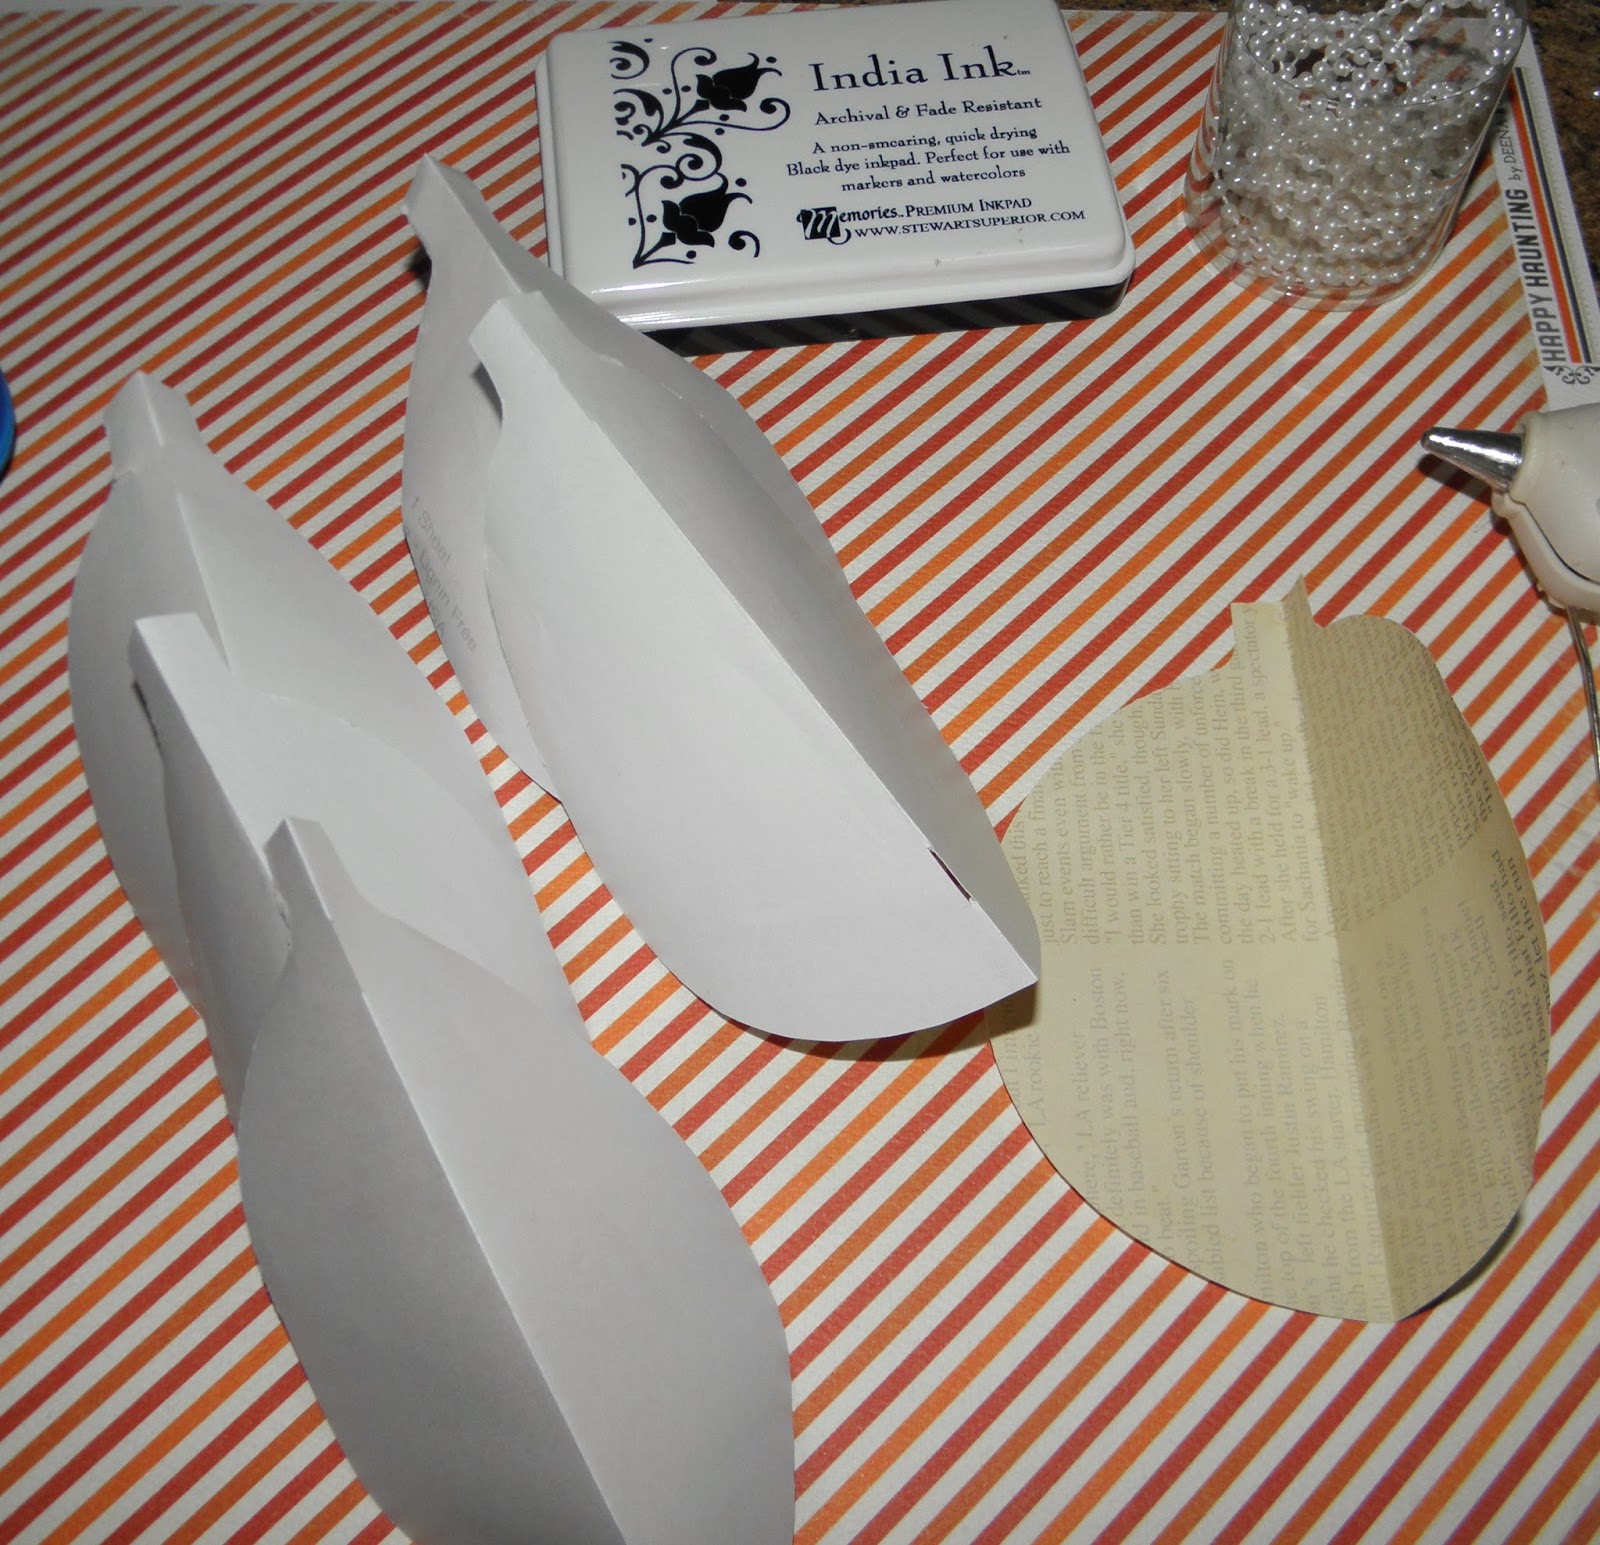
Cut out circles, about 5" in diameter.  My circles were made using my Cricut and the free 3D Ornaments cartridge.  You can use a punch or a stencil to make yours.  Then, fold them in half, down the middle.

Use your Clockworks set of  Stamps and stamp random numbers on the right and left of the middle crease on each circle.

Fold your circle with the white side showing.  Using your glue dot runner, apply adhesive to it. Stick the next circle to this one and apply glue to it, just like you did before.  Do this to all the circles except the last one.

Before you add the final circle, put a bead of hot glue down the center of he ornament.  Lay your string of pearls in it, leaving a few inches coming out of the bottom and make a loop for the top, so you can hang it on the tree!

Here is a picture showing the ornament from the top.

This is the finished ornament!  See the pearl loop on top?  and the leaves and flowers at the bottom, glued to the pearls?  AWESOME!

Here is another view.  This ornament should have 7 half circles.  I love the vintage feel you get with the numerals!  And a Victorian feel with the pearls and flowers.  These look so pretty on the tree!

Thanks for stopping by..

Tuesday, December 17, 2013

WOYWW

Hello and welcome to my desk!!  Why are you interested in my desk?  Visit Julia!  She has the links to fill you in!

My desk.
I have been making origami dresses as my design team project for Niji Creative Collective Blog.  You can read all about it by clicking the link!!

But here is a picture showing my dresses.
I think they are so sweet and will look awesome on cards and other paper craft projects!

Thanks for visiting and enjoy the party!!


Tuesday, December 10, 2013

WOYWW

I am so excited to be back this week!  With the holidays fast approaching and work deadlines, I didn't have any time to play last week!!  But I'm here this week and excited to see what your workspace looks like!!

Confused?  Check out Julia's blog!!  It is her party!

Here is my desk.
I made something that is a LOT of pictures!  So, I will tell you about the desk first, and if you don't want to see the next pictures, you can stop here!!  I have my normal supplies out and my badge of course!  You may notice my Inka Gold Rub.  I used it on the clock I made in the post before this one.

THEN, I finished my Halloween book!!  I KNOW it is Christmas Time!!  But this book took so much time to finish!!  It has 12 pages and each page has 2 tags (I didn't photograph the tags).  Since I have been working on holiday things first, I have had to steal just a few minutes each day to finish this!  I know myself and if I didn't finish it, it would forever be "that book i never finished".  So, here it is!!


Thanks for visiting and enjoy the party!!

Monday, December 9, 2013

CLOCK CHIPBOARD BOOK

Sin City Stamps has several new products now!  In addition to their awesome stamps, they now carry stencils, masks, chipboard and die cuts!  

And I got to work with this gorgeous Wood Clock Book!! 

I only decorated the cover.  It includes a blank circle of wood for the back!!

SUPPLIES:


Gather your supplies.  To begin, use the Inka Gold Rub on the wood surface.


I rubbed the gold into the etched numerals and the clock hands.  Then, I applied several coats of white ink and let it dry.


The ink is water soluble and the rub is waxy so it resists the ink.  Using a waterbrush, or a wet wipe, start removing the ink from the numerals and the hands of the clock.  I also removed some of the ink from parts of the clock to give it that aged look I wanted.


How cool is that?  I love how the wood and the gold is revealed after the white ink is "washed" away!


Rubbing a bit of the brown ink over the clock will bring out more of the detail.


Embellish the front as you wish!  I added a pretty button, pine cones and leaves.

I hope you enjoyed this tutorial!  Please visit Sin City Stamps and see all the new items!!


Tuesday, December 3, 2013

Altered Arts Magazine FREE HOLIDAY ISSUE!!

I am so excited to share my awesome project that is in the new FREE BONUS ISSUE of Altered Arts Magazine!  Just click on the link to get your FREE digital issue!!!

I made a cone with a wood (painted and decorated) star that I attached to the front.  The cone is filled with gold tissue paper and a Christmas Image and a bottle tree.
All of my materials and instructions are in the issue.  Enjoy creating your own!!  

AND, Now through Deccember 15th, you can take $7 off a one year subscription by using the code bonus7 when checking out from our website!