Pages

Tuesday, January 28, 2014

ALTERED PAGES BOOK

I loved making this book!  Almost all of this book is made with items you can get at the Altered Pages Store online.  I will point out the items, and give you the links page by page.  I am going to give you the general link, so you can see all the choices you have!

First, the cover.
I started with a book from Glitz Designs.  I covered it with Vintage Text Pages,and stenciled on that with white ink.  That is the link to all the stencils Altered Pages has so you can find all the stencils I used on this book there.  I covered the center with Joss Paper.  I got the Altered Art Pack of Tags and used them throughout the book.  The Glass Tiles and  Sari Ribbon were added and of course, gauze and a flower.

Again I used stencils and Joss Paper.  I also painted the pages with Niji Pearlescent Watercolors.  The Library Cards and Pockets are super fun for books!

These pages are painted, then text paper was added.  I used the Altered Art Tags here too.  I added some flowers and gauze.

Painted, Joss Paper on the left and a stencil on top.  On the right, I painted and doodled some white dots.  The Altered Art Tags were used on both sides and another Library Card and Pocket.

Painted and stenciled again.  Altered Art Tags too.  But I also put a kraft Paper Clock.

Finally, I finished with Text Paper, Altered Art Tags and Paint.

Thanks for visiting today!  I hope you find the links helpful, and maybe you will even check them out!! 


Monday, January 27, 2014

SPLASH AND ORIGAMI

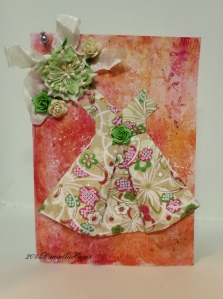
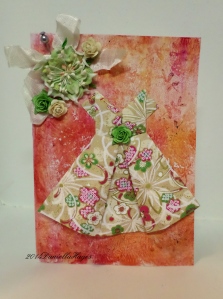
Today I am sharing a card I made with Splash Ink and one of my origami dresses.
SAMSUNG CAMERA PICTURES
SUPPLIES

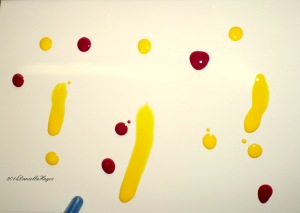
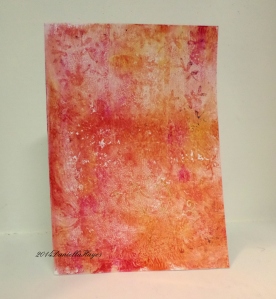
I started by dropping the Splash Inks onto a glossy card.  I only used Maroon and yellow.
SAMSUNG CAMERA PICTURES
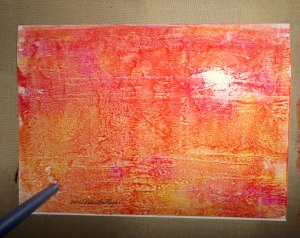
Next, I used a brayer to spread the ink.  It looks beautiful already!
SAMSUNG CAMERA PICTURES
I stamped some random stamps into the ink when it was almost dry.  Then, I let it dry completely.
SAMSUNG CAMERA PICTURES
You can see some random flowery  stems.  It gives the background a subtle bit of interest.
SAMSUNG CAMERA PICTURES
Just add your embellishments and you are done!  I added a seam binding bow and pin.  Some Prima flowers around the bow, and one in the center of the dress.
Thanks so much for visiting today!  I hope this project will inspire you to try something new today!!

Tuesday, January 14, 2014

CHINESE NEW YEAR CHALLENGE

Happy Tuesday!

Today I'm sharing a necklace I made for the Altered Arts Challenge "Chinese New Year".

I used the Altered Pages Collage Sheet Asian Glass Slides.  I cut the images into 1x1 inch to add to the Ranger Memory Frames that I had.  I used some faux pearls on the ends and used seam binding for the actual "necklace" part.  I have a chain that I was going to use but I thought the ribbon looked nicer.  It measures approximately 18 inches long with the ribbon tied, but can be made longer or shorter.

I also put collage images in the back of the necklace.

Since I couldn't take a picture of it on myself (i tired) I thought who would be a better model than Hello Kitty!  I have soooooo much Hello Kitty stuff.  I've never shown you my studio.  You may think it's too much, but I don't!  I have everything Hello Kitty.  This Hello Kitty only one of many.  I have 3 white, 2 gold, 1 pink, 1 purple, 1 red, 1 tan.  There are plenty more, but we can visit them another time!!

Here is a close up of the necklace.


I hope you make beautiful things with Altered Pages Products, and join us on the challenge blog!

Monday, January 13, 2014

CLOCKWORKS TAG

Happy Monday!

I made a fun tag to share with you today, using SinCity Stamps and Die Cuts.

SUPPLIES:

Start with a light neutral ink as your background color for your tag.


*You know, SinCity now has  Masks!  BIG selection to choose from!!*

Place your mask on your tag.  Ink over it with a brighter color of ink so you get a really good contrast in color.


Go around the edges of the tag with the Vintage Photo ink.  Using the Stewart Superior India Ink, stamp some Roman Numerals, Clock Hands and Screw Head stamps on your tag.


And finish by putting some of the Die Cut Keys on a piece of rope and tying it to the top of the tag. Finish tag with a few pearls. 


I was thinking of all the things you can do with this tag.  You could use the numerals like place cards at a party.  The numerals can be made to show an age for a birthday present tag.  Or just make some tags because you like using Roman Numerals!  I just think these stamps look so cool!  I've used them several times already!!

Have an awesome day!!

Friday, January 10, 2014

COLOR MY WORLD

Don't you love it when you make a project that has a mind of it's own? 
This is one of those projects.

SUPPLIES:
Gather your supplies.  Fill 1 mister with Yellow Splash Ink, 1 mister with Blue Splash Ink and mix Splash Ink to make 1 mister of Red Ink.  You only need these 3 colors for this project.


Draw a winding area on your canvas, lightly, with a pencil.  Make light marks to show where the next color will start.  With just those 3 inks, we will make a smooth transition of all colors.


I didn't have every color of flowers so I made some from paper and mostly used white flowers.  I had a lot of yellow and green flowers for some reason.  Place your first color of flowers, and your last color of flowers on the canvas, using Nori Paste.  Let me tell you, if you want something to stick forever THIS is what you want to use!!  Just brush it on, apply flowers, gauze, etc.  and in a short time it is stuck!!  


This is  the layout.  Fill in the rest of the canvas with flowers, gauze, burlap and pearls.


We will start spraying the yellow Splash over the yellow flowers and the canvas.  From top to bottom.  Go a little over onto the next flowers and canvas.  Then spray red Splash over the yellow (to make orange) and on the red area of flowers and canvas.  Go a little over onto the next flowers and canvas.  Spray the blue Splash Ink over the red (to get purple) and onto the blue flower and canvas area.  Go all over the blue and green areas with the blue, then go over the green area with yellow Splash Ink.  You have made a beautiful rainbow!!


Use your markers to write the words, and outline them with black.  Add ribbon pieces last and a few more pearls.  I couldn't help myself, I had to spray glitter on it too!  And add wire spirals.  I told you it had a mind of it's own!! 
  Because we sprayed the ink, we have a beautiful gradient of color!  Some of the white of the canvas and flowers is still showing which just adds more emphasis to the colors 

Go color YOUR world!!

Wednesday, January 8, 2014

WOYWW

Hello Desk Hoppers!!  It has been far too long!  Want to know what I'm talking about?  Check out Julia's Blog.  She has all the answers!!

Here is my desk.  Very tidy!  I got a new white organizer so I took the shelf down that was on that wall and put the organizer against the wall.  It looks like I have soooo much more room!  I had all of my stuff in canning jars, and now it is in the organizer. No more jars!
My  badge is placed proudly in front of the organizer.

**If you wouldn't mind, would you please be a friend of my blog?  Thank you!  You are awesome!*

Enjoy hopping around the globe!!

Tuesday, January 7, 2014

PINK PERSIMMON 2 FOR TUESDAY!

Hello and welcome to the Altered Pages and Pink Persimmon 2 for Tuesday Hop!

I have made a fun "Bottle Cap" piece using paper I got from Altered Pages and a stamp from Pink Persimmon.
I just got a new camera and I'm working out the kinks still. Sorry it's a bit dark!  I cut the paper in a circle and attached it inside the bottle cap. I made the paper roses myself, and put some "Bubble Gum Pink" Dylusions spray on them, that I got from Altered Pages.  I stamped the "Sweet Heart" stamp from Pink Persimmon and added the sticker.  I got the bottle cap, the spool and the pin from Maya Road.

Here's the hop list!

Have Fun!