Pages

Showing posts with label Daniella Hayes. Show all posts

Monday, November 23, 2015

THANKFUL WEEK WITH TOMBOW USA!

Hello Friends and thank you for visiting!  In honor of Thanksgiving, the Tombow Design is celebrating with Thankful Week on the Tombow Blog!  The Design Team will be showing projects that express how thankful we are, and that show our gratitude.  
Did you know that November is Gratitude month?  For the past 5 years, I have made a gratitude journal every November.  It is something I wish I could remember to do every day, not just in November. According to National Day Calendar, “Research has shown that gratitude can enhance our moods, decrease stress and drastically improve our overall level of health and well being. On average, grateful people tend to have fewer stress related illnesses and experience less depression and lowered blood pressure, they are more physically fit, they are happier, have a higher income, more satisfying personal and professional relationships and will be better liked.”  
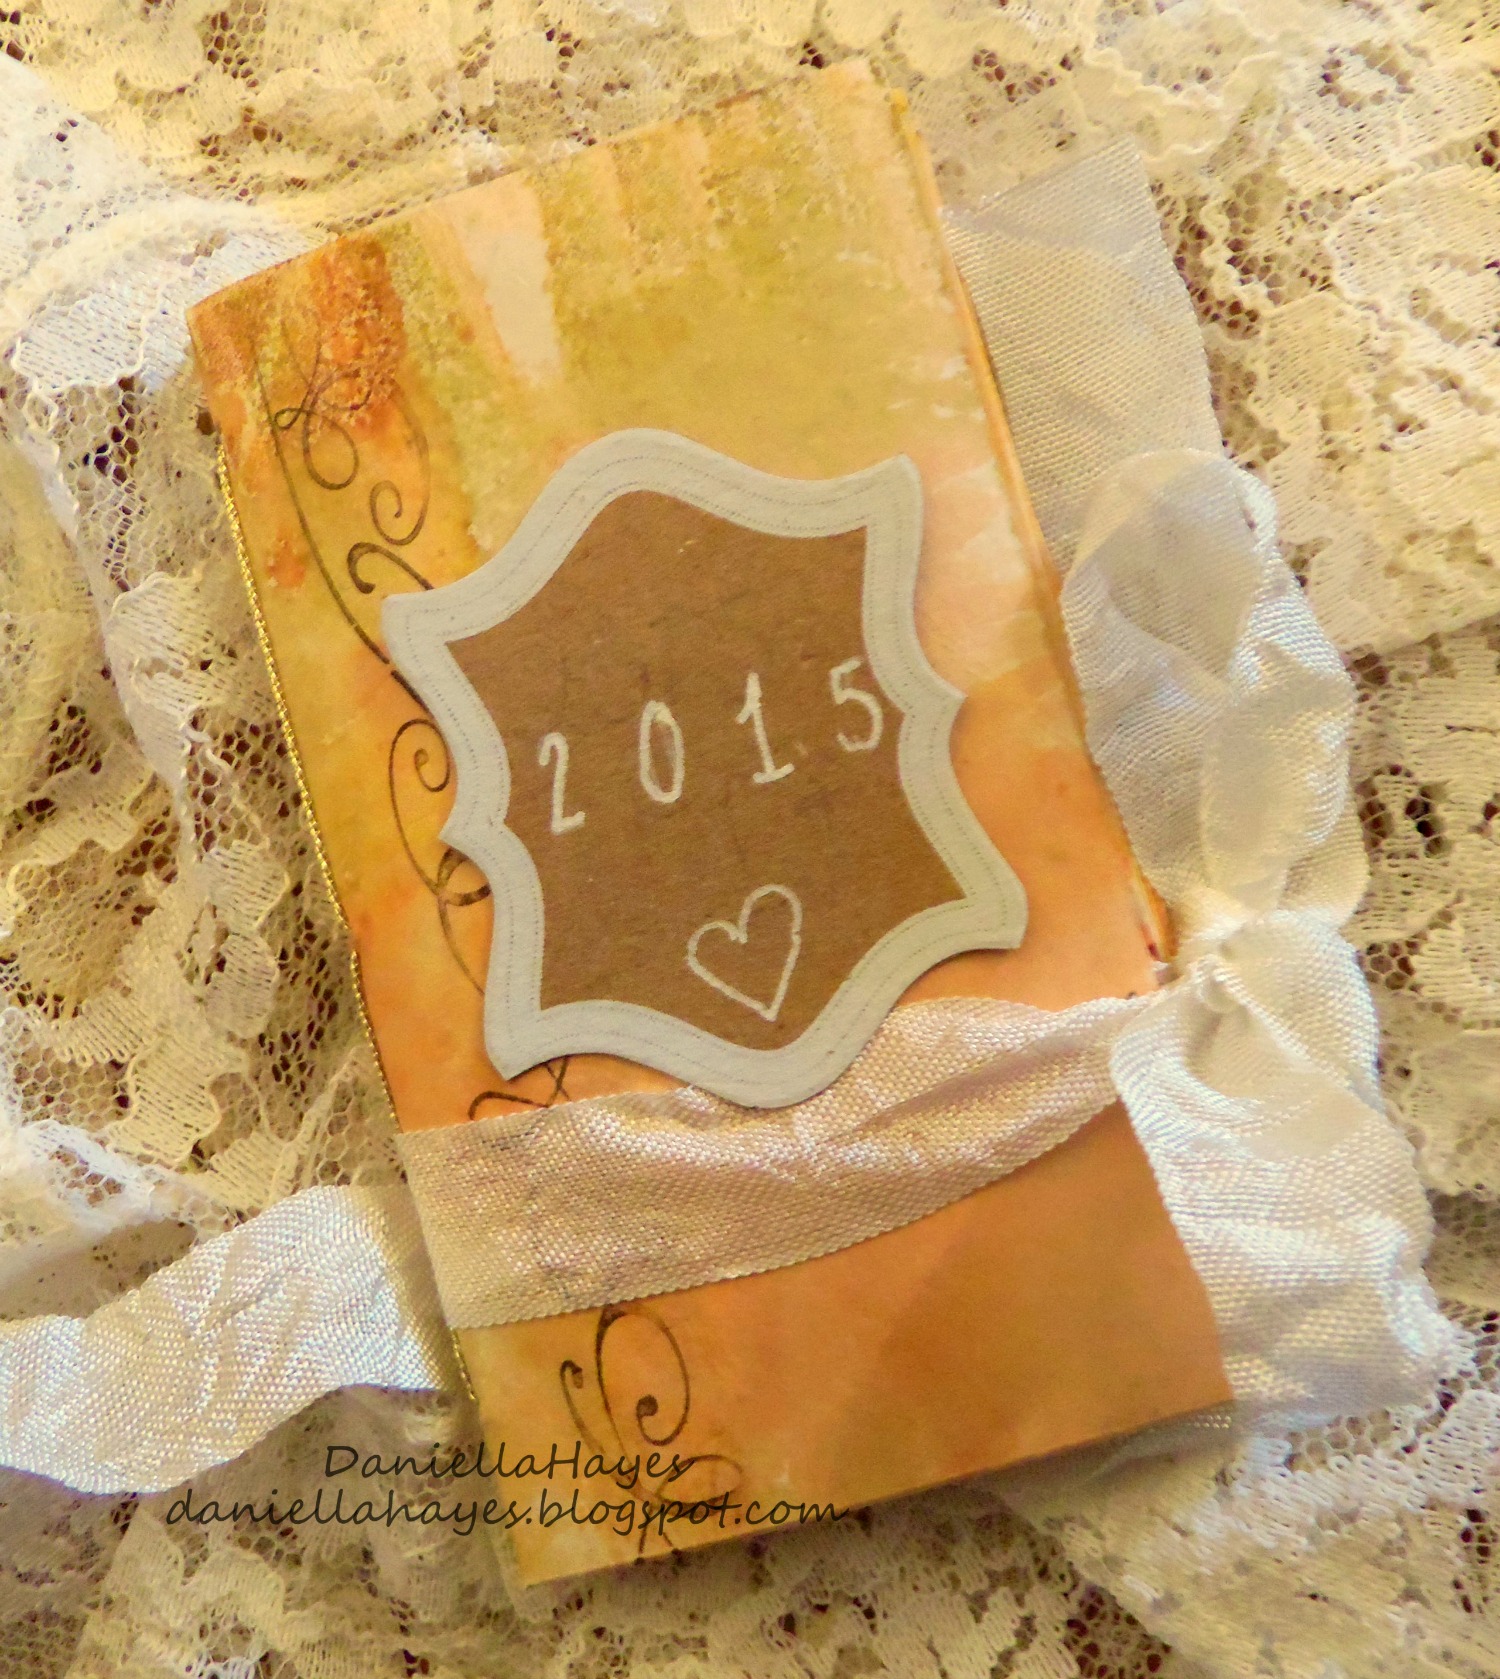
Daniella Hayes Gratitude Cover
This little journal is only 3 1/2" x 2 1/2".  Just big enough to write one or two words about what you are thankful for.
Daniella Hayes Gratitude 1
I cut some cardstock for my book and took out my Tombow Dual Brush Pens and a Gelli Plate.
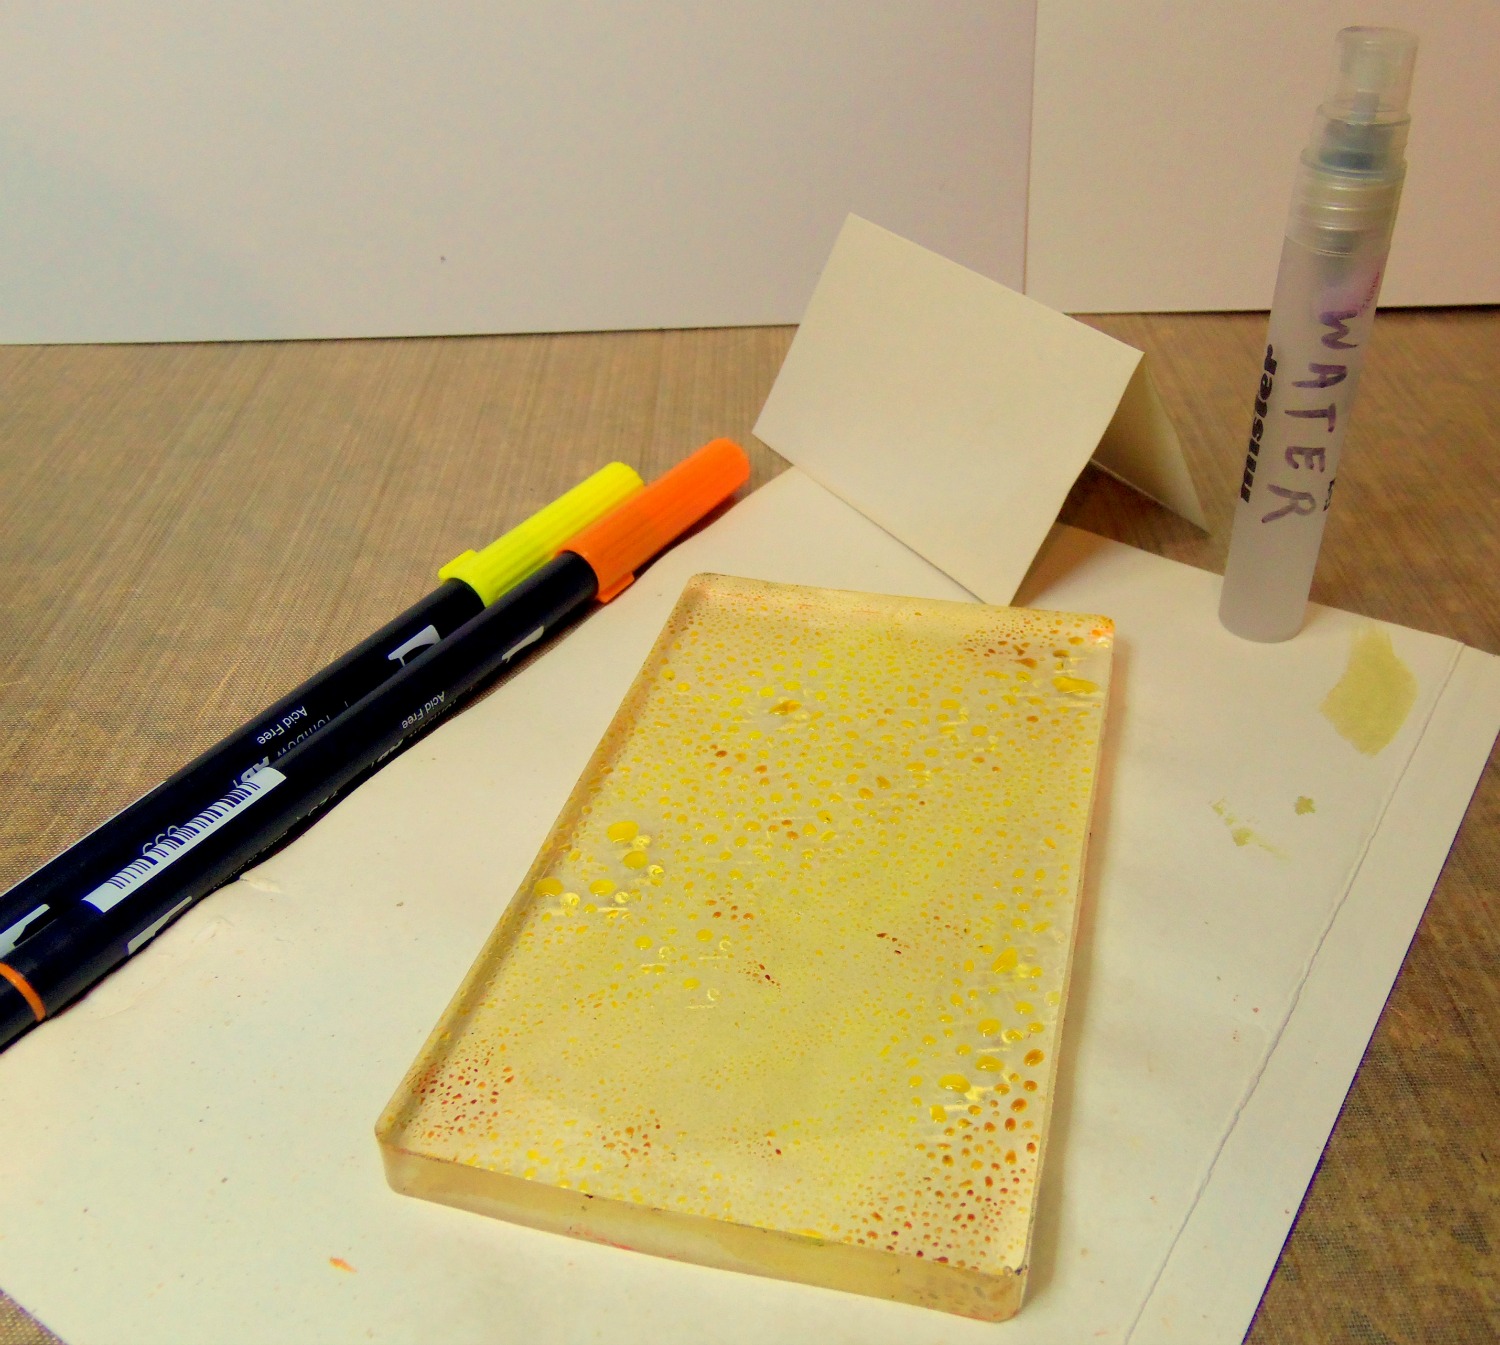
Daniella Hayes Gratitude 2
By swiping the markers across the Gelli Plate and spritzing it with water I was able to make beautiful watercolor prints on my paper! You could also do this with your Tombow Blending Palette.
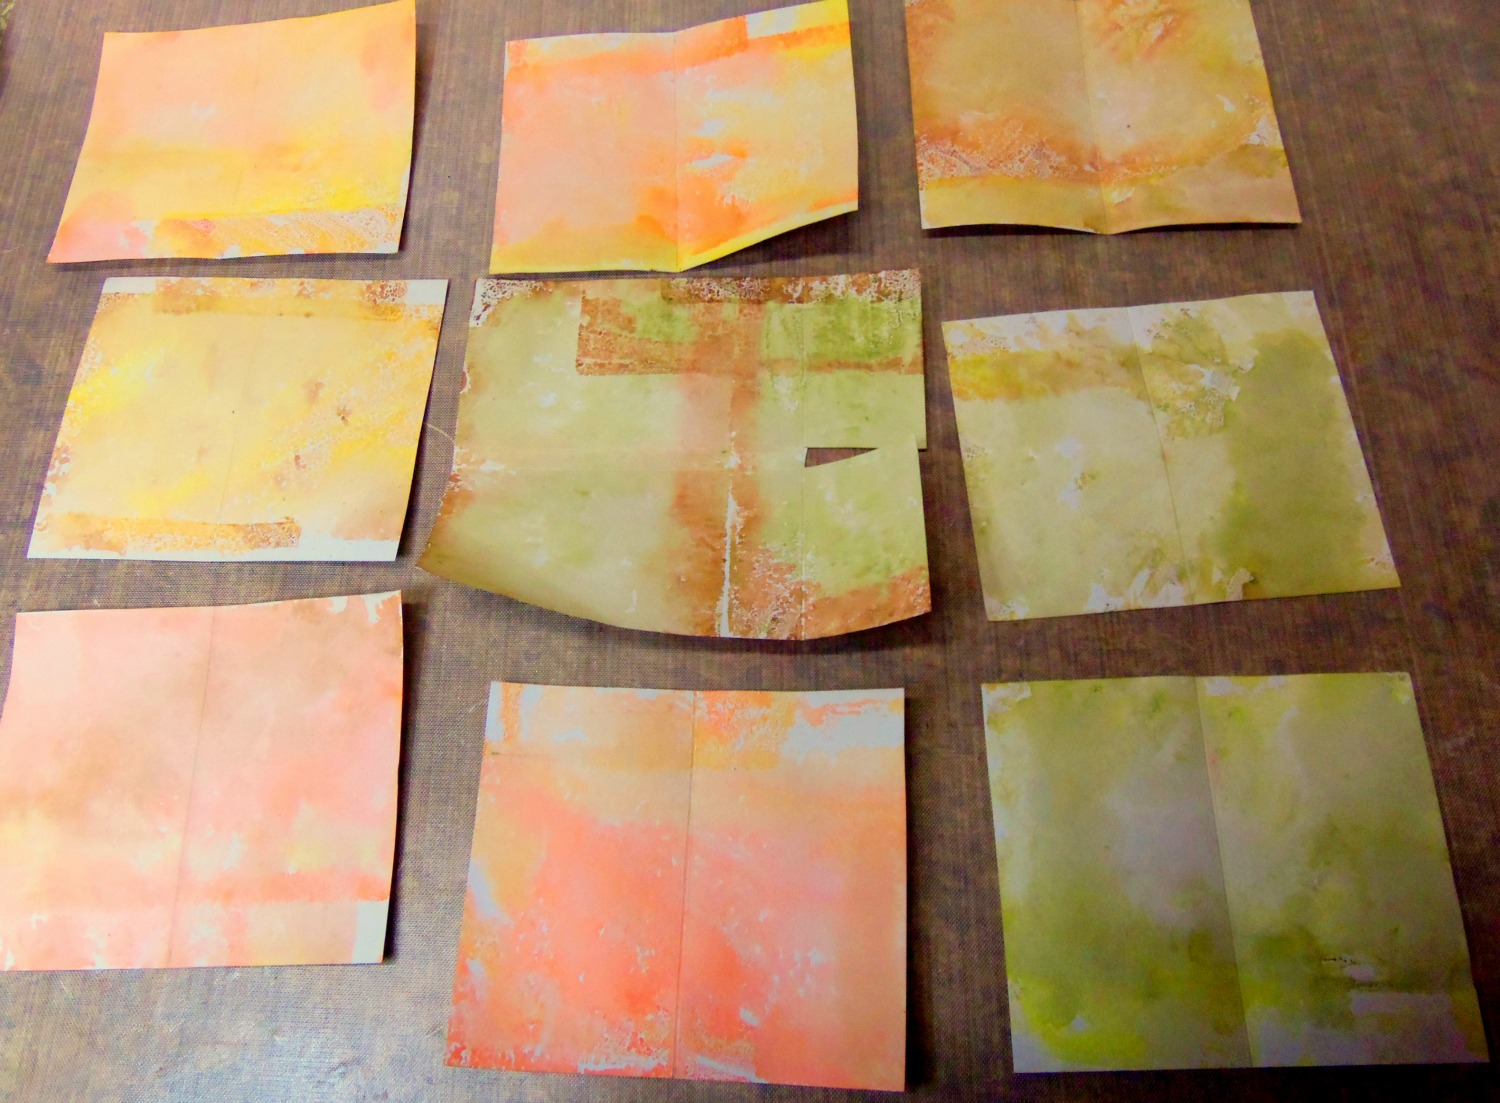
Daniella Hayes Gratitude 3
They are soooo pretty!!  Remember to do this on both sides of the paper.
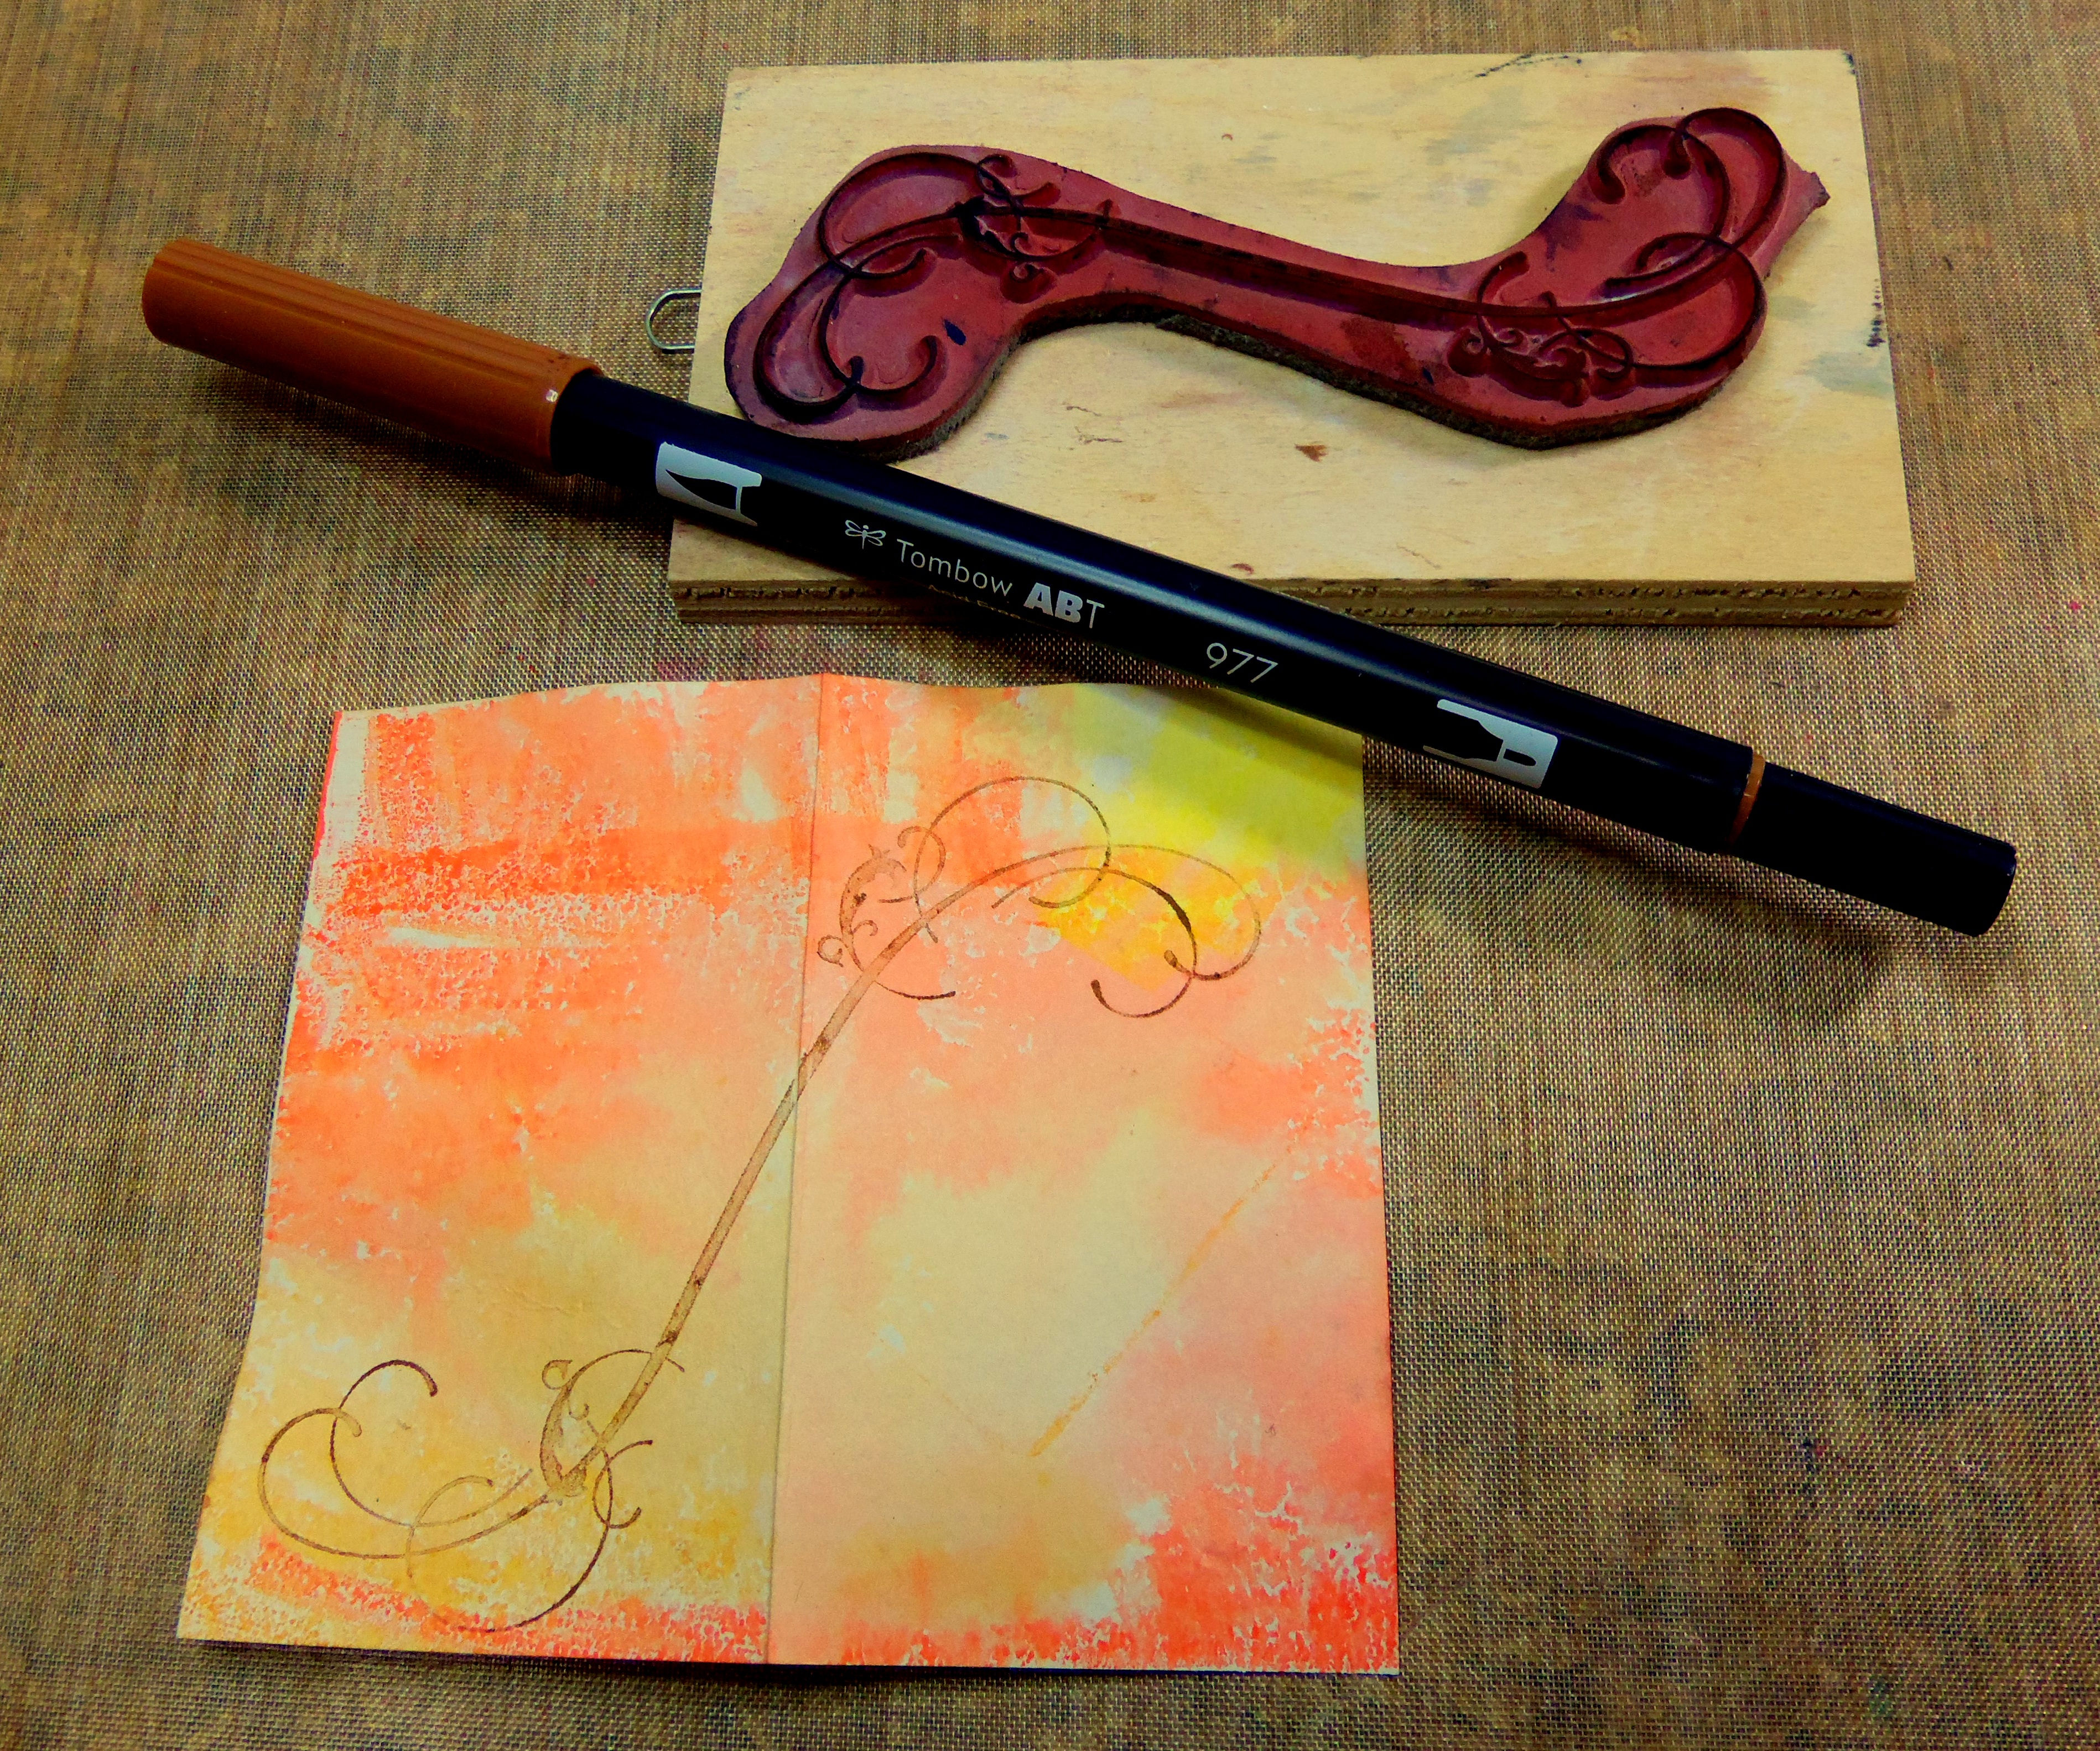
7
Then I used my Dual Brush Pen, brush end, to ink up some stamps and randomly stamped on the pages.
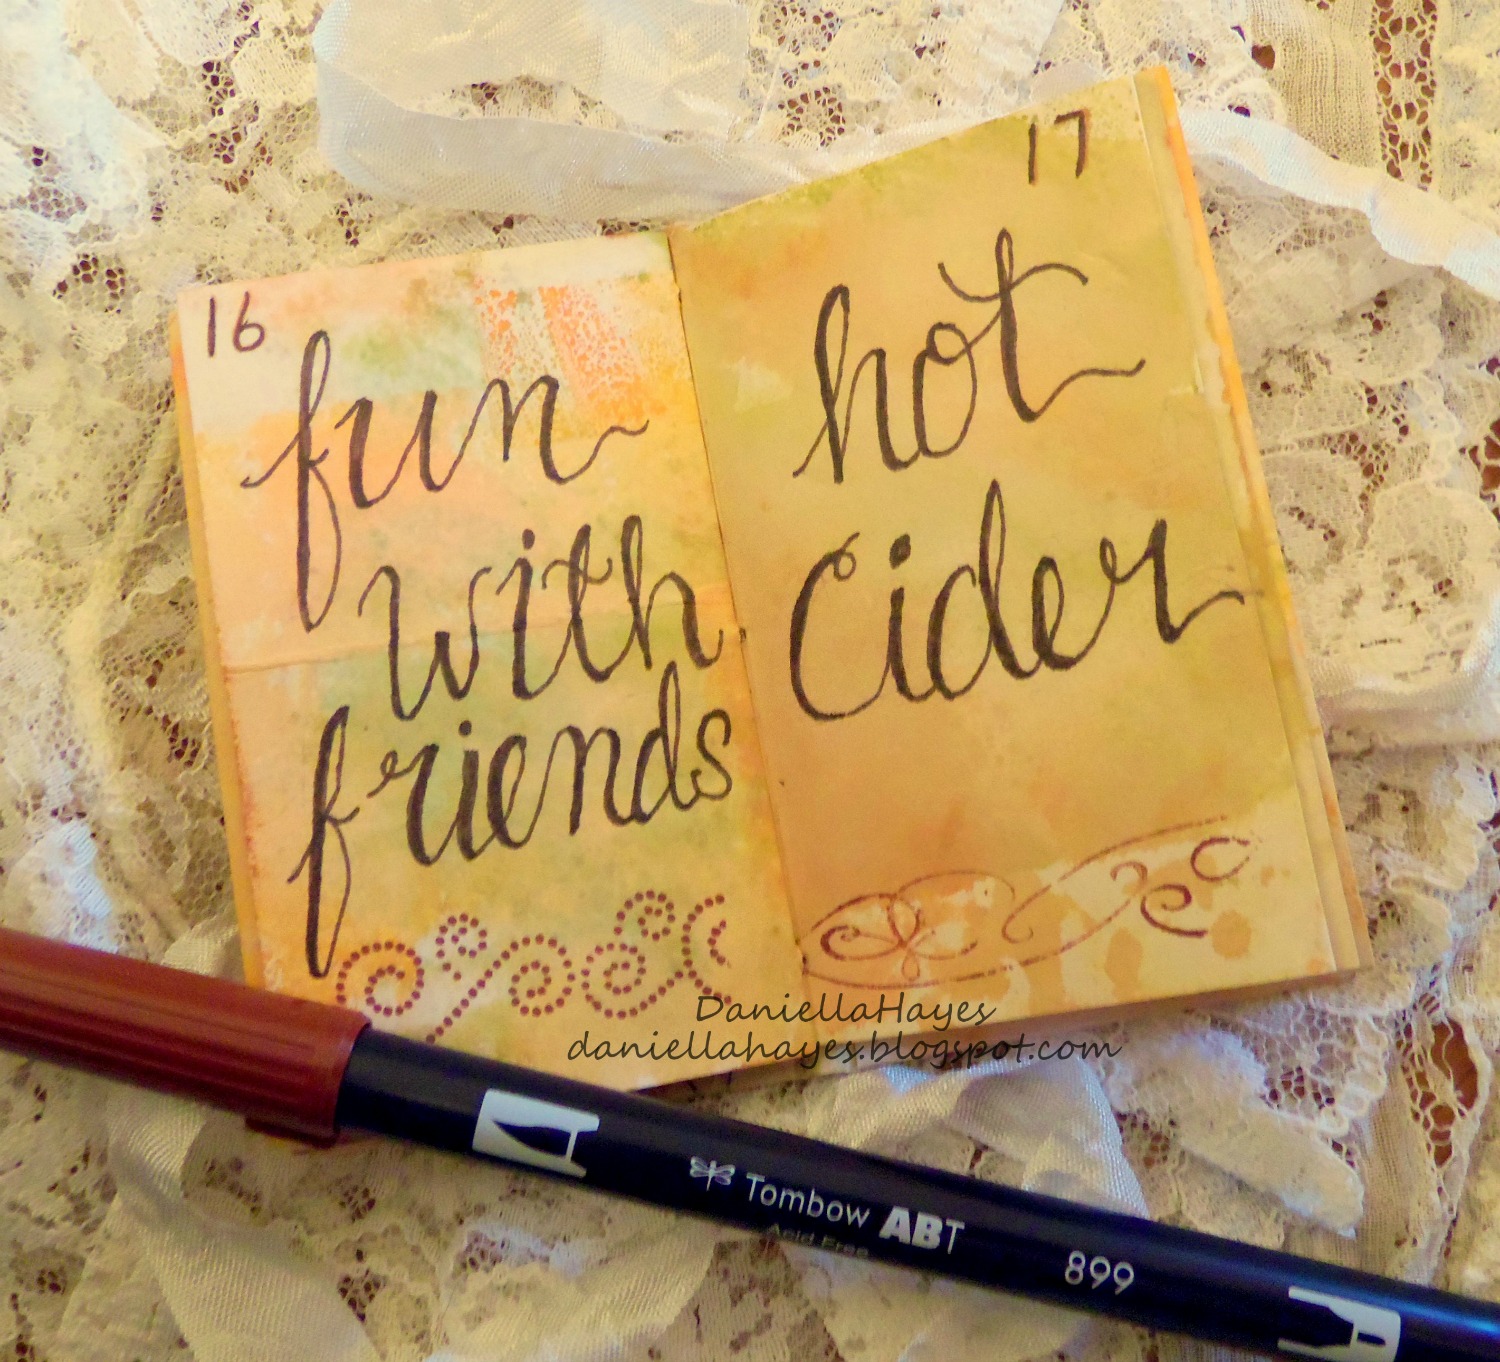
Daniella Hayes Gratitude Pages
After I made the pages into a book, I numbered each page and every day I write 1 thing I am grateful for.  I used my Tombow Dual Brush Pen again to write with.  The pages are wrinkled and warped from the water, but it gives it more charm I think *although it made my pretty lettering a bit wobbley*.
Daniella Hayes Gratitude Cover
I added some seam binding to close the book, and a little label with the date on it.  I adhered the label with Tombow Mono Multi Liquid Glue.
I hope I have inspired you to make a project about things you are thankful for!  And keep visiting all week to see what the rest of the Design Team is thankful for!
xxDaniella

Tuesday, July 28, 2015

SPLATTER FLOWERS

Hello and thank you for visiting today!!  I have a super fun project to share with you!  I call it "splatter flowers"!  It's a really easy technique that gives big results!


SUPPLIES:


I placed my shell stencil on my watercolor paper and applied molding paste with an old gift card.  I prefer an old key or gift card to apply molding paste because I can cover a large area quickly.  When you are done, remove the stencil and let the molding paste dry.


Now it's time to splatter!!  I used the shell stencil so the paper would have some texture for the paints to move around in.  Add a LOT of water to your Twinkling H2O's (or any watercolors) and dip a round brush in it.  Start with the yellow and splatter all over the paper by tapping the loaded brush all over the paper.  Remember to dip your brush often and continue to add water to the paints.  When the yellow is dry, move on to the yellow-green and do the same thing and let dry.  Now pick 2 of the same color family, get the paints really wet and splatter them in a more concentrated area on the paper.  Do this in 4 separate areas.  *TIP*  You can use inks or spray inks to do this technique too!


I know it looks a little like a hot mess but have faith!  It will be awesome!!  As you see in the 4 areas, the paint really moved around leaving some white areas and some areas where the yellow paint shows through.  I love the 2 areas on the top and the bottom right. The bottom left got too much solid color so I didn't use it for this project, but I saved it to use somewhere else!

Now we stamp!  Attach your stamp to an acrylic block and using the black ColorBox Archival Dye Ink, to ink up your stamps.  This ink is perfect for a watercolor project because it is permanent and won't bleed or smear in wet media.  Stamp a flower over each of the 3 watercolored areas.  I cut the 4 sections apart so they were card sized, and stamped a flower on each.


WOW- I- LOVE- THIS- SO- MUCH!!!  I actually thought I would like this flower least because the leaves wouldn't be green but I was so wrong!!  I like this one best!  The abstract look is fabulous, the texture from the stencil is amazing and the splatter is awesome!!


OK,  It's a tie.  I LOVE the blue flower on the right too!!  Oh which one to like best???  TOO HARD TO CHOOSE!  Because the purple flower is lovely too!

I hope you try this super fun project for yourself!  I can't wait to see what you make!


Tuesday, June 23, 2015

3 DESIGNERS AND 3 VIDEOS USING MY "BIG BOLD BLOSSOMS" STAMP SET


Hello and thank you so much for visiting today!  I have a super fun post to share!!

Terri SproulBarbara Rankin, and Myself have all made Mixed Media Cards,using my Big Bold Blossoms Stamps!  And we all made videos to go with them!  Is that awesome or what??

And because we did this awesome thing, there is a special coupon!
40% off everything in the store!!  SUPER AWESOME!

This is the card Barbara made~

This is the card Terri made~

And this is the card I made.

Here are the links to our videos too.

 I hope you enjoy the videos and get AMAZING things from the store with that super coupon!
xxDaniella


Monday, June 1, 2015

TOMBOW DESIGNER FAVORITES


This week the Tombow Designers are sharing their favorite products on the Tombow USA Blog!

My favorite Tombow Adhesive is the Stamp Runner Dot Pattern Adhesive!
I used it to make this card. Even to adhere the flower!  Want to know how??  Watch my video!  It will tell you everything you ever wanted to know about this product!


Thanks for visiting!!  Check out the Tombow blog this week to see the rest of the Design Team Favorites!!

xxDaniella


Wednesday, May 13, 2015

BIG BOLD BOUQUET


Hello!  Today I am sharing an art journal spread I made, with my new "Big Bold Blossoms" Stamps From Sin City Stamps!

Supplies:


First, I stamped 3 of my flower stamps several times on white cardstock and cut them out.

Next I painted the Radiant Gel paint on my art journal pages.  I waited about a minute and sprayed a little water on it.  When you lightly wipe off your water with a paintbrush, you get both brush strokes and water drop marks.  I've only done this with acrylic paints.  How cool is that for the background!

Now I painted my flowers with Twinkling H2O's.  I used 3 different orange colors, 1 yellow color and 2 green colors.  I love how shimmery these are!!  And mixing the colors is so smooth and delightful!  These are so fun to work with!!

Because it was overcast and rainy I had to take the pictures inside and you can't see all of the sparkle :(  The Twinkling H2O's have Mica in them and they sparkle like crazy!  The Radiant Gels are iridescent paints and shine!!  I will try to remember to take a better picture to show you how shiny this is!

Thanks so much for visiting!  I really hope you check out all Sin City Stamps has to offer, and while you there you can get a set of my stamps!  There are 8 large red rubber stamps for just $20!
xxDaniella

Thursday, April 16, 2015

MIXED MEDIA TUTORIAL ON THE BELLA BLOG


I love making my own mixed media backgrounds.  Patterned paper is wonderful of course, but making your own designs is super fun and will always be the perfect fit for your work.


By making my own mixed media background I was able to make 2 cards, 2 tags and 2 ATC's.  I can leave them like this, or continue to build on them or embellish them.


I have a full tutorial on the Bella Crafts Quarterly Blog today.  I hope you will check it out and enjoy making your own mixed media backgrounds.  I can't wait to see what you make!
xxDaniella


Monday, April 13, 2015

THE WIZARD OF OZ CARD


A couple of weeks ago I won a prize on Terri Sproul's Tuesday night live show.  She has a free art journal/canvas show every Tuesday.  Check out her Facebook Page All Things Terri Sproul to find out more. 

I won that prize for knowing some Wizard of Oz trivia.  So I thought I would make this card using the Wizard and Dorothy 2 stamp set from SinCity Stamps.

Supplies:


I gathered my supplies to start.  I picked a gold flecked paper and a pretty floral paper.  I found this piece of a glitter die cut paper in my "stash basket" (which is so full it will soon be a stash box because there is so much leftovers and papers and stuff in it).  I thought the red glitter die cut had to be used to represent Dorothy's Ruby Slippers.


Next, I cut the papers and stamped the images.

I colored the image in with my markers.  I love the highlight the stamp makes on the tablecloth.

To finish, I cut the die cut apart and added it behind the paper and on the card front.

I hope you make something awesome today!  Something that commemorates something that made you super happy, like winning a prize.

Please click the links to the SinCity Stamps store.  There is so much awesomeness there, you will want it all!!
xxDaniella 

Sunday, April 5, 2015

HAPPY EASTER!

Moxxie has the  cutest papers!  Doesn't this card look like it has a real chocolate bunny on it?
SSsoooooo CUTE!

There are many pieces to all of Moxxie's collections.  There are several double sided papers, die-cuts and stickers.  I picked my pieces from the "Spring Has Sprung" collection.  I picked "Cottontail", *he is just too sweet* "Spring Fling" *such a pretty blue* and "Bluebird" *i think it looks like dyed Easter eggs* as my papers and the Double Sided Die-Cuts border *that looks like a fence*.  I also got my Easter stamps (sorry I don't remember who made them), Ranger Distress Ink "Evergreen Bough", Tombow Stamp Runner Dot Pattern Adhesive and a water brush.  I took out ribbon, but didn't use it.

I cut and layered all of the papers on a card base and stamped "Easter" at the top.  Then, I colored the greenery on the fence with the same ink and a water brush. I adhered it across the bottom of the card.  I had to, literally be restrained hold myself back from adding splashes of paint, ribbons, gauze, buttons, ink..... you get the point.  But I wanted the artwork on the paper speak for its self.  It is just that beautiful!!

Thanks for visiting!  Please look for Moxxie products in your Local Scrapbook Store or online.  I know Scrapbook.com and other online shopping sites carry Moxxie.  

Have an amazing day!
xxDaniella

Monday, March 30, 2015

TOMBOW APRIL SHOWERS CHALLENGE

This week the Tombow USA Blog has a challenge for you! Get your umbrella! It’s time for April Showers!

Tombow April Showers Challenge

Make anything you want using this Mood Board as inspiration and the April Showers theme.  This challenge will start on March 30 and will end on April 12 at 11:55PM EST. Winner will be announced Monday April 13.

I made 3 project examples as inspiration for you.  Just jump over to the Tombow USA Blog to check them out!!

And, with every challenge there is a PRIZE!!  This bundle of awesomeness from Tombow USA!!
The brand new, awesome,  Tombow Adhesive Dots, the fabulous Tombow Mono Aqua Glue and a wonderful set of Tombow Dual Brush Pens!!   I used all of these products, and more, in my examples.  I did something really cool with the Mono Aqua Glue that I think you will love!

Remember, the challenge starts today and ends April 12 at 11:55 PM EST.  The winner will be announced on April 13th.  Just go to the Tombow USA Blog and link your project.

I can't wait to see what you make!

Have fun and Good Luck!!
xxDaniella


Friday, March 27, 2015

TOMBOW AND DCWV GOLD AND CORK HOP


Hi and Welcome to the Gold and Cork Blog Hop with Tombow USA and DCWV! We have 2 days full with gorgeous projects using GOLD and CORK! You probably came here from Karen Hanson's Blog, but if you happened to stumble across my blog go to the Tombow USA Blog (on Friday) DCWV Blog (On Saturday) to start!

We were given some awesome products from DCWV to use.  The DCWV Insta Photo Fun Album, DCWV Adhesive Cork Stack and DCWV The Gilded Paper Stack.  
I used the Adhesive Cork first on the album cover.  I adhered a piece of Gilded Paper on top with Tombow's X-Treme Adhesive.  X-Treme Adhesive is 5x stronger than standard tape runners and adheres to a variety of surfaces, including cork.  I wanted to be sure my cover would stay strong.   I used Tombow Mono Multi Adhesive around the label to add glitter *awesome* and attached it with Tombow Foam Tape.  

        
 Inside, I added a few 4" x 4" pocket page protectors and the papers and cork from DCWV.  I added gilded paper to the insides of the album with my Tombow Stamp Runner.   I also made dividers for the album.  I cut 2 pieces of paper and attached them together with my Stamp Runner.  Isn't this album the cutest??


Now.... THE GIVEAWAY!!


To win, visit and comment on the participating blog posts. You have until March 31st at 11:59 EST to comment. A winner will be picked randomly and announced on April 1st 2015.
Tombow will be giving away: Tombow Xtreme Adhesive, NEW Tombow Adhesive Dots, NEW Tombow Foam Tape and everyone’s favorite the Tombow Mono Multi Liquid Glue!
DCWV will be giving away: The DCWV Gilded Stack, a 4x4 Cork Stack, Insta Kraft Album, Accordion Album and a set of Birthday Photo Props!

Remember to “Like” Tombow USA and DCWV on Facebook.


Friday, March 27th:

Daniella Hayes  <<YOU ARE HERE

Saturday, March 28th:

YOUR NEXT STOP IS Piali Biswas

Thank you for visiting!  Enjoy the rest of the hop and good luck!!
xxDaniella


Tuesday, March 24, 2015

AN "ORGANIC" ART JOURNAL PAGE


If you didn't already know, Terri Sproul has a free art journal/canvas show every Tuesday night.  Check out her Facebook group All Things Terri Sproul to get all the details!  It is her birthday this week, so she isn't having a show.  HAPPY BIRTHDAY TERRI!!!

This art journal page I made for SinCity Stamps was inspired by Terri's show last week.  The show was called "Organic Look".

SUPPLIES:
Just as Terri showed on her show, I started by applying masking tape on my pages and covered them with Gesso.  The maksing tape gives the background the beginning of the "Organic Look" because it is irregular, like nature.

Because I didn't have large stamps for the flowers on my pages, I did some messy writing on the gesso, to take up space and write down something I wanted to remember.  I added India Ink to my Fineline Applicator and wrote on the page.


Then I painted over the writing with Halo Pink Gold and Pearl Turquoise.  I added glazing medium to the paints, painted them on and wiped them off with a baby wipe.  You really see the masking tape texture when you use glaze.

*sorry for the slight glare.  It's hard to not get a glare with metallic paints*

Like I said, I didn't have big stamps like Terri had, but I had a plan!  What if I took the tree branch from the "Hoot Owls" set and stamped it several times, making the look of a bush.  Then, I could turn the branch over and make some leaves and swirls at the bottom.  AND THEN, I could add the roses from the "Rosette Hearts" set and it could look like rose bushes!!  OH MY HECK!  This was going to be the most awesome thing I've ever made or the worst.  SO I just went all in, and got....

AWESOME!  I am so in love with this!  My vision is a total success!

I painted the flowers with Pearlescent Magenta and Metallic Gold in the centers.  WHAT?  Perfect! 


 But how to get that "Organic" look Terri talked about???  Flower Soft of course!!  I used Tombow Mono Multi Adhesive and a Fineline applicator to add glue, and sprinkled Flower Soft on top.


What do you get when the Flower Soft dries?  Awesome times 5million!!!


Here is a close up of my rose bushes with Flower Soft on the stems and leaves.   


Don't you just love when a project comes together like this?  I love when this happens.  You get an idea and that idea sort of takes over.  Like it has a mind of it's own.  I love the excitement and the slight fear you get at the same time.  But when it turns out better than you expected it is priceless!!

I hope you let the art take you on a journey of excitement today!  You will love the results!
xxDaniella